


Canada Post
Canada Post is generally the third choice for shipping, after ATS and Canpar.
Shipping
Login and password are attached to the Shipping monitor, or see SHIPPING DEPARTMENT CONTACT INFO.docx in Help > Shipping on the H:\ drive.
|
 Click to enlarge |
Voiding
- The Shipping interface is treated as a window, so Close it (near top right)
- Select Shipments List (refer to weight to select correct shipment)
- Right-click and selected 'Delete selected printed and processed'
- To return to shipping window, select New (top left)
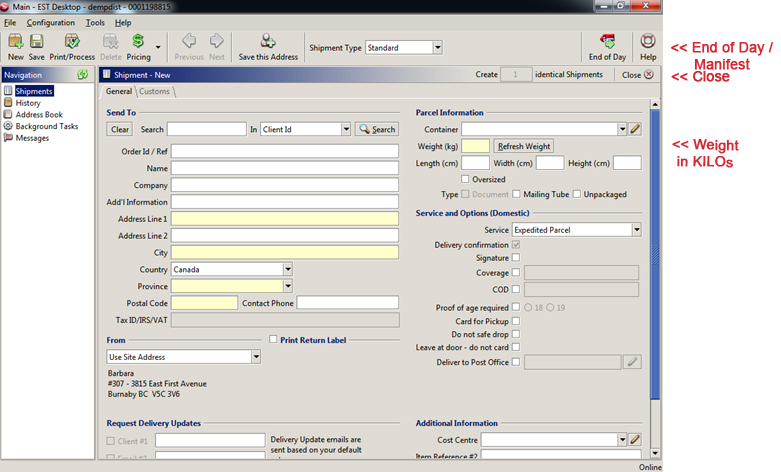
Tracking
|
 Click to enlarge |
COD Deliveries
|
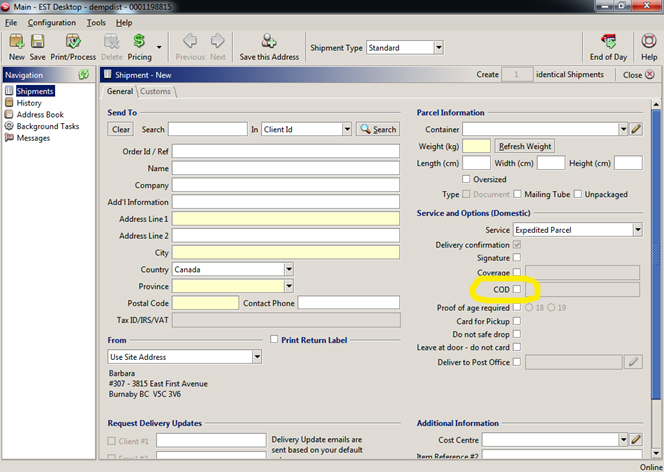 Click to enlarge |
Updating Addresses
Addresses need to be updated every week. If an Address change has been notified to Dempsey, Customer Service is supposed to mark it on the Header of the next Order that will ship to the Customer. If this is not done, the Warehouse will not know to ship to the new location.
Prepare the file for Canada Post from HiPoint
- In HiPoint select CM and go to Barbara's account 6698359
- Change the second line of the address to today's date, in the format 13-Jun-2014
- Right-click in CM and run to File, called customers.csv - the name is important!
- On the Data machine, open CreateCanadaPostAddressBook.accdb - only the Data machine!
- Select Import HiPoint Data, then Create File. This places a file with today's date on the G:\ drive for retrieval form the Canada Post application.
Open the Canada Post On the left hand side of the screen, select Address Book. This displays the latest imported Address Book.
- Right-click > Delete Entire Address Book
- File > Import > Addresses
- Navigate to the file you created earlier, named something like CanadaPost_150616.csv
- Select to use "Address groups within file"
- Import the addresses
- On completion, go to Barbara's account 6698359 and check that the address shows today' date. If it does not, something went wrong with the import.
Leave a Reply